 Whether you’re new to the world of DIY or you consider yourself an old pro, I have no doubt that you’ll find this information to be invaluable. My aim is to ensure that the DIY process is not only easy and safe but also super successful for you, allowing it to become a long and fruitful journey rather than just a passing phase.
I encourage you to take the time to carefully read through the following recipe hints, tips, and essential information. By doing so, you’ll be better prepared to embark on your DIY adventures!
Substituting Ingredients
Sometimes you will want to use an ingredient different to one I’ve suggested. That is totally fine! Go for it. Just be mindful when making substitutions, that the recipe outcome will probably change (that might be a brilliant thing, or it might not, either way, you’ll learn something). Also, remember to make notes on your recipe edits so you can replicate it (or avoid it) in the future. Here are some commonly requested ingredient substitutions and my suggestions:
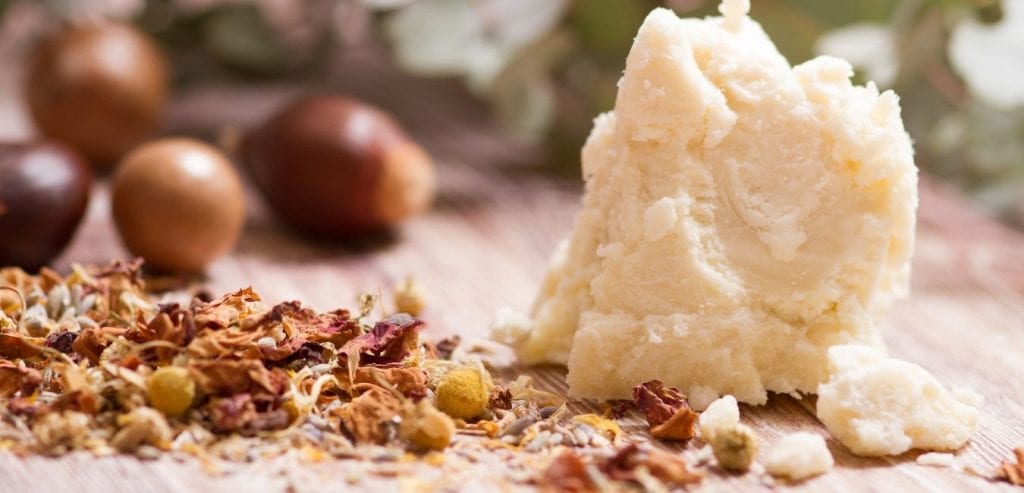
〉Shea butter – In most cases, shea butter can be left out and replaced with coconut oil (the type that solidifies) and beeswax (at a ratio of 90/10). It can also be substituted with cocoa butter or mango butter, but be mindful that the recipe outcome will be much firmer (and even a little brittle) so you might like to swap a small amount out (20-30%) and replace with a carrier oil.
〉Beeswax – If you’re vegan and prefer not to use beeswax, substitute with candelilla wax – but reduce quantity by 50%.
〉Borax – I don’t have a problem with borax (read about it here) but if you prefer to leave it out of your DIY cleaning, just leave it out. There’s no need to replace it with anything else. That goes for dishwasher tablets and washing powder.
〉Carrier oils – All carrier oils are interchangeable, depending on availability, and your preferences and skin type. This blog will help you decide which one will suit your skin type best.
〉Coconut oil – In most cases coconut oil (the type that solidifies) can be left out and replaced with shea butter and a carrier oil of choice (at a ratio of 50/50).
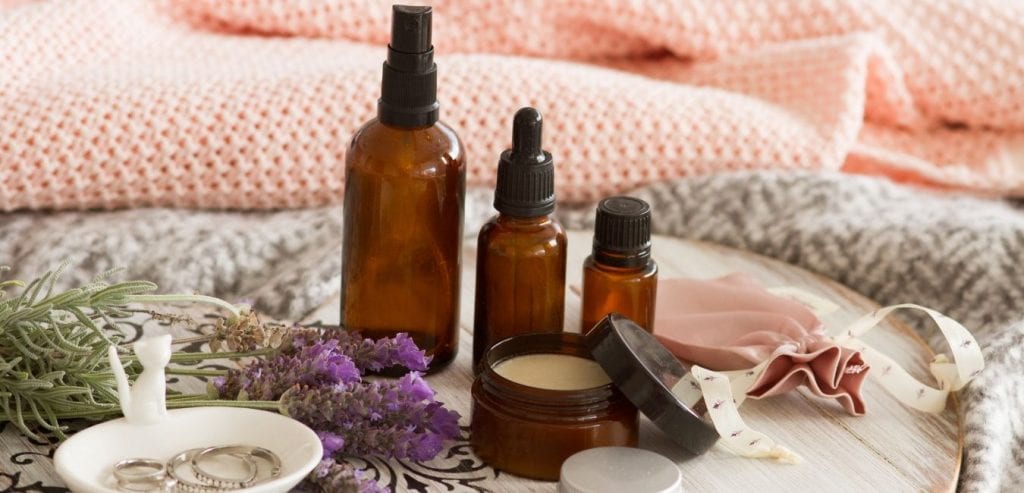
〉Essential oils – These can be substituted with whatever you prefer to use or have on hand. Read this blog for more info on essential oils, plus blends inspiration.
〉Magnesium Chloride and Epsom Salt (Magnesium Sulfate) – It’s best you stick to my suggestions for this one. I have chosen the form of magnesium that I believe to be best suited to each recipe.
Choosing Suitable Containers And Packaging
〉Glass versus plastic – While I personally always prefer glass over plastic, sometimes glass isn’t the best option, particularly around children and slippery surfaces like bathtubs, showers and kitchen sinks. Plastic use is controversial when using essential oils, however, in the dilution rates suggested in my recipes, they should be fine (and if you’re still not convinced, think of mainstream products containing essential oils that are packaged in plastic). When storing in plastic, choose PET or HDPE plastic. Ultimately, the choice is yours.
〉What size do I need? Deciding what size packaging to use takes a little forethought. Look at the recipe and how much it yields, and compare it to the packaging you have. I suggest making all recipes in a bowl first, so you can be sure you have the capacity to add all ingredients and combine, before pouring it into your container of choice. There is nothing worse than adding four ingredients to a bottle and then realising your final ingredient won’t fit! Of course, some recipes are just easier to make straight in the bottle or jar. Make this decision for yourself once you’ve read through the recipe in its entirety.
An easy way to work out the capacity of your container is to place it on a set of scales and tare the weight back to ‘0’, then fill it with water. The difference between grams (ounces) and millilitres (fluid ounces) is minor and won’t impact the recipe outcome here.
〉Little tip! – Something I often do with serums and oil-based recipes is make up a large batch and store it in a ‘master’ jar, refilling my dropper top or roller bottle as needed.
Recipe measurement Information
〉Body care – I use weight as my preferred measurement, rather than millilitres (fluid ounces) and cups, simply because it allows for consistency. For example, when you measure an oil into a cup, inevitably some gets left behind. Coconut oil is another one – sometimes it is liquid, sometimes it is solid, so weight will always be the most consistent way to measure it. Skin-care balms, creams and powders need more precision than cleaning recipes.
I do recommend investing in good kitchen scales that will measure down to the gram (ounce) – they’re usually not too pricey.
The only ingredients listed in my recipes with spoon/drop measurements, are those that don’t register in weight due to the small amount required, or those where it makes practical sense to list a teaspoon or tablespoon (note that I have used Australian measuring spoons).
〉Cleaning – To make things easier, I now list my cleaning recipes in teaspoon, tablespoon and cup, gram and kilogram, or millilitre and litre measurements. More often than not, cleaning recipes do not require the same precision with ingredients as skin-care recipes do. The exception is Dishwasher Tablets and Blank Canvas Fizzies as these need to be precise.
A Note On Methods
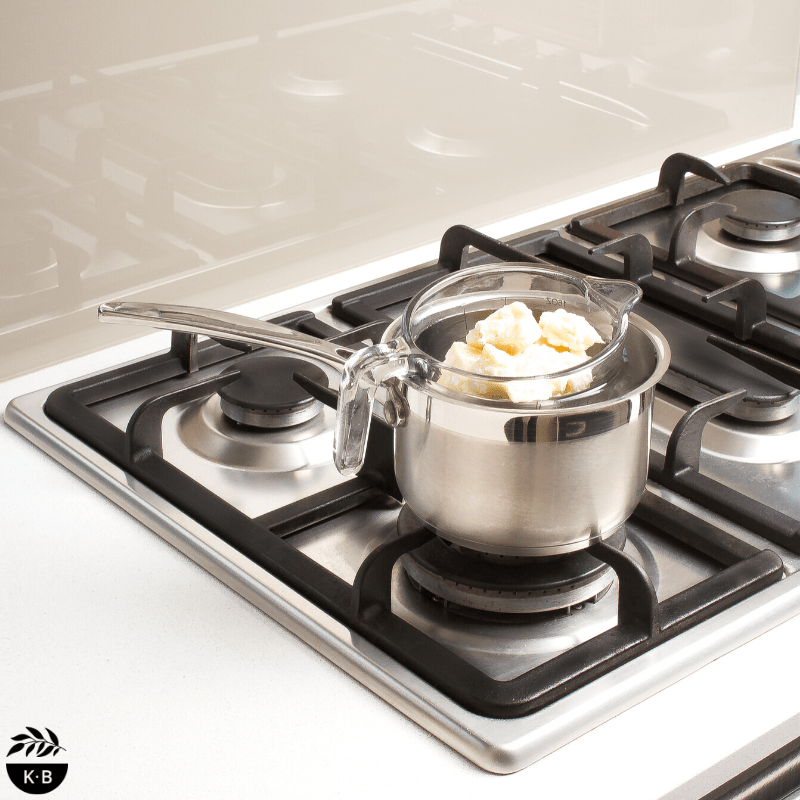
The methods for my recipes include a list of instructions that most people with basic appliances and utensils can follow. It will often require the use of kitchen scales, mixing bowl and spoon/whisk, blender, stove etc. You may need to use a double boiler or microwave to melt ingredients. A double boiler allows for even and gentle heating and consists of two nested saucepans: the top (which could also be a glass jug or bowl) containing ingredients, and the bottom with gently simmering water – enough to cover the bottom of the saucepan (about 5cm). Be careful that water doesn’t make its way into the top bowl containing ingredients. Mix ingredients periodically – it actually helps them to melt faster!
When using a microwave, aside from general concerns surrounding microwave use, be aware that they also have a tendency to heat unevenly and create hot spots. To help minimise this issue, I recommend microwaving on the lowest power setting for no longer than thirty seconds at a time, checking and mixing in between bursts.
I have removed the thermal appliance methods from this website. You can read why here.
Answers To Common Questions
〉Can I leave an ingredient out? As long as you understand that the texture and consistency of the recipe may change, then give it a whirl. Keep in mind that you may be altering the function and purpose of the recipe. Remember to keep notes on any recipe-tweaks so you can repeat or avoid them next time.
〉How can I make my balms a little less solid? Reduce the beeswax by 20-50%.
〉What can I do to stop my products melting in the summer heat? Increase the beeswax by one teaspoon at a time until you’re happy. Never leave balms or creams in the car or in direct sunlight.
〉I love the base for that recipe, but I don’t have the essential oils you suggest. You have permission to experiment, substitute or leave them out. Just make sure you make a note, so you remember how to recreate the combo if you love it. Remember to check out this blog on essential oils.
〉How can I test an essential oil combination before adding it to my ingredients? Simply combine a little coconut oil (the type that solidifies) or carrier oil (preferably one that has no aroma) with a smaller ratio of your chosen oils and apply to your arms. You will smell the top notes first, so leave it on for a good hour before making your decision. Continue to tweak your blend until you’re happy and then it should be pretty safe to add to your recipe. I learned this one the hard way!
〉I want to tint the colour of my balms; how do I do this? Add ½ teaspoon of cocoa/cacao powder per 100g of melted balm and mix well. Add more powder if required. If you find cocoa/cacao to be too dark, try using bentonite clay. Have a read of this blog for more colouring tips.
〉What can I do to make my balm feel less greasy? Adding one teaspoon of arrowroot flour per 100g of melted balm and mixing well should help. However, the most effective way to reduce that greasy feeling is to use less balm. If you’re new to DIY, you might be used to products that absorb right into your skin, feeling dry almost immediately. We’re not using ingredients that perform this way. Don’t be too heavy-handed. Tinting balms can also help reduce greasiness (see point above).
〉How do I avoid grainy balms and creams? If you follow my recipes and set balms and creams in the fridge as suggested, you shouldn’t have this problem. Solid butters and oils have a melting point, and once they cool down they re-set to a solid form. This can be done several times without compromising the properties of these ingredients – keep the heat gentle and moderate. Examples of melting points are: shea butter – approx. 40˚C, beeswax – approx. 65˚C and coconut oil – approx. 25˚C.
Sometimes, balms containing shea butter (also cocoa and mango if you’re swapping out the shea) go ‘grainy’ over time – it may look like the product is blooming with mould spots, but it’s (usually) not the case. This is usually due to melted balm cooling down too slowly and fatty acids solidifying at different temperatures. The easiest and most efficient way to combat this is to place balms in the fridge (or freezer) to set, forcing the fatty acids to cool down and solidify at the same rate (graininess is more of an issue when balms cool down slowly).
Note that graininess doesn’t affect the integrity or performance of the final product – it might just feel odd on your skin until you’ve rubbed it in. And if you forget to set your balms in the fridge and find your mixture becomes grainy, you can gently melt your balm again, and mix/whip it to make it smooth.
Keep an eye on your balms and take them out of the fridge or freezer once they’ve set. As a guide, this usually takes approximately thirty to forty minutes in the fridge, and ten to fifteen minutes in the freezer.
Extra, Handy Tips
〉Adjust your expectations – Especially if you are brand new to DIY. If you’re used to crystal-clear, squeaky-clean glasses, then you might not love the dishwasher tablet recipe; if you’re used to antiperspirant deodorant, you might not be an immediate fan of the deodorant recipe. Just remember why you’re giving DIY a go and keep at it. I can almost guarantee you will adjust and love the results in the long run.
〉Read each recipe in its entirety before starting – This will help prepare your mind. Then, ensure you have all the ingredients and tools handy, so you can maximise your recipe success.
〉Be forgiving when it comes to results – It is difficult to guarantee the outcome of any given recipe, and you might find yourself making one batch of something with great success, only to find yourself making it again and being less than happy with the result. Because there are so many elements that may affect recipe success, if this happens to you, the best advice I have is to ‘dust it off’ and try again.
〉Recipes may be halved, or doubled – This is handy when sharing your creations, just make sure your appliance or bowl size will accommodate your alterations. Some recipes are written specifically for 50ml or 100ml bottles, but these quantities can be altered (I have suggested the most common size). However, for those recipes described as single use, I’d encourage you to leave as they are.
〉Always keep preservation in mind – This blog includes essential information on shelf life.
〉Label everything you make! Chances are you won’t remember what is in that bottle or jar a few weeks down the track.
I have no doubt you’ll have success with these tips under your belt!!


6 Comments
How long is the shelf life on the diy magnesium cream? Or do I need to keep it in the fridge?
Have a read of this info regrading truly natural DIY, once you know it you know it: https://krissyballinger.com.au/blog/preservatives-shelf-life-and-safety-information/ Happy making!
what makes the cream creamy? how can I make it less oily? adding another type of magnesium makes it liquidity how do I make this a thicker cream?
Which recipe are you referring to specifically, Deniece?
Can you please recommend where to purchase cotton candle wicks from for the recipe in your book?
Hey Kate, I share supplier info here 🙂 https://krissyballinger.com.au/blog/my-favourite-suppliers-of-natural-ingredients-packaging-accessories/